
Oh, my! Can you believe that I’ve basically been away from this blog for month??!! Yes, I took a little unofficial vacation from it. Sorry to all of you who have been checking back regularly. Life. It happens, you know?! We went on a vacation, and then in the past few weeks I’ve been super busy with the shop (lots of new collections to add!), styling parties (I just got a sweet message last night that you might get to see a new one very soon!), and my kids. I had to prioritize. My baby just started waving, babbling, cutting teeth, and crawling in the last couple weeks and my 3 year old isn’t sure what to make of it. So excitement AND drama! A mommy’s “favorite” combination, right?!!
While enough about me, I hope you all have been fabulous. And I hope you are up for something fun! When I posted the round up of paper fan backdrops a month ago, I received a lot of inquires about how to make them so below is a tutorial. And if you are not that adventurous (or simply pressed for time, like we all are) you can purchase them at Polka Dot Market, Party Cheap, and at many other places including Luna Bazaar.
To make your own Paper Fan, you will need the following:

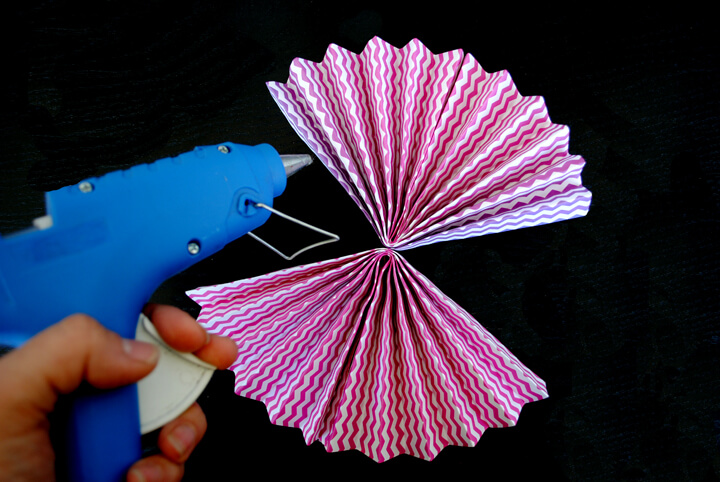
– 2 sheets of scrapbooking paper
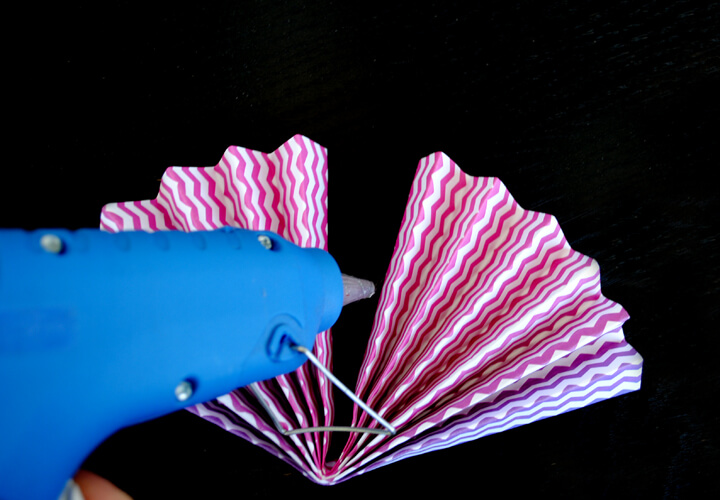
– hot glue gun (of course! have I done a tutorial yet where you don’t need one??!)
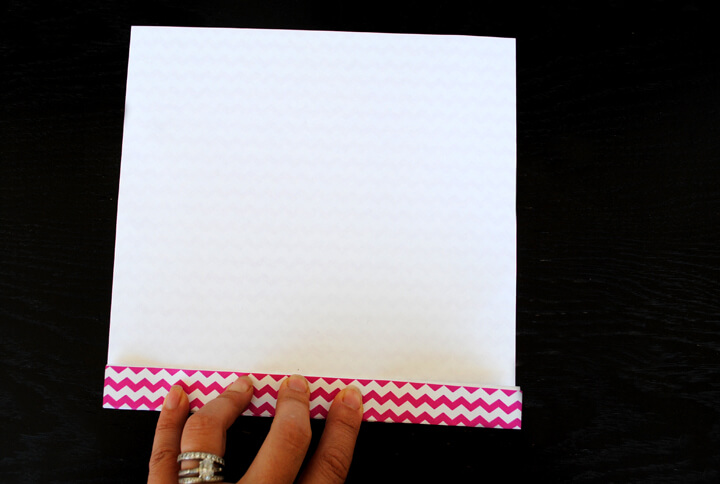
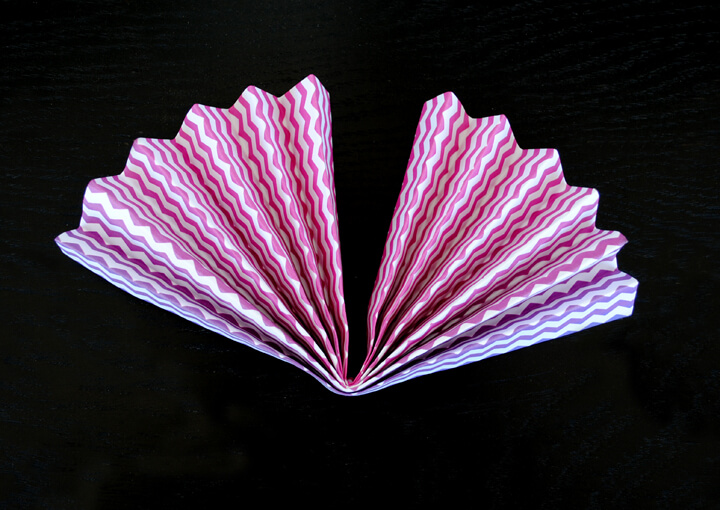
1. Fold your paper back and forth, making accordion folds.


I love paper fans, but I never thought about making big ones like this. I can’t wait to try it. Thanks for the tutorial.